How to Create a new Managed Disk in Azure from a Snapshot

After you have taken a snapshot of a virtual machine in Azure, you will have to create a managed disk from the snapshot in order to attach it and use it in a new virtual machine.

1. First, search for and click on “disks” in the Azure search bar:

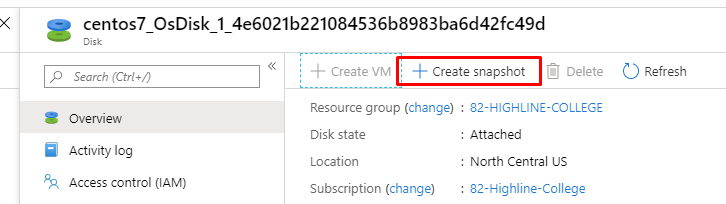
2. Next, click “Add”:

3. Make sure you select the correct resource group for your subscription. For the ‘source type’ field, we will need to specify the source as a snapshot. In the following ‘source snapshot’ field, we will then need to select the snapshot that we wish to create a disk from.

4. For my particular subscription, I am required to use the standard HDD account type for the ‘size’ setting, so make sure to click ‘change size’ here and do the same if your subscription also requires the same, otherwise your validation will fail in the next step. Click “Review + create” when you are finished, or click “Next : Tags” if you need to tag this new disk.

Steps 3 and 4 are both seen in the above image

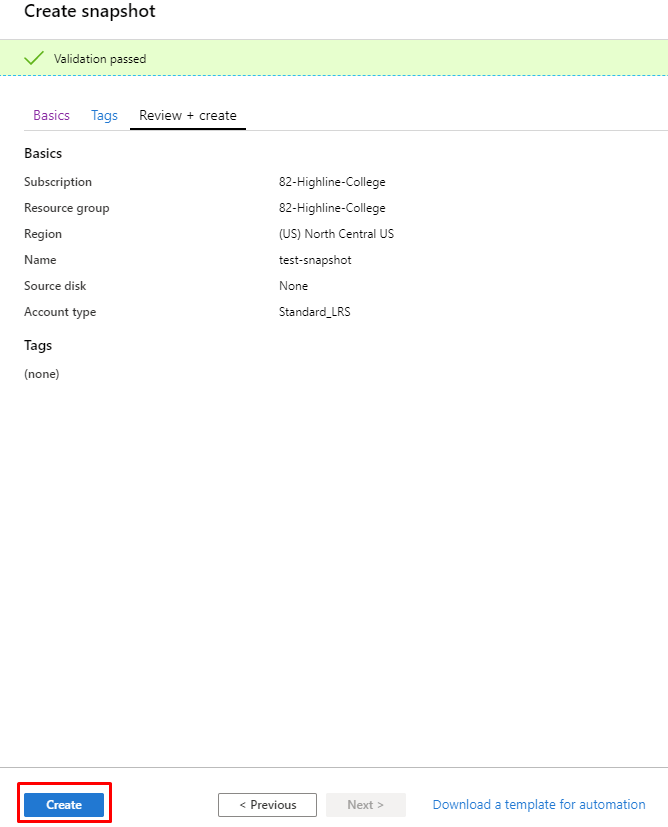
5. A validation test will be ran, and if your validation passed, you can now click ‘create’ to finish creating your new managed disk. If validation failed, you will need to go back and correct the settings that caused it to fail.

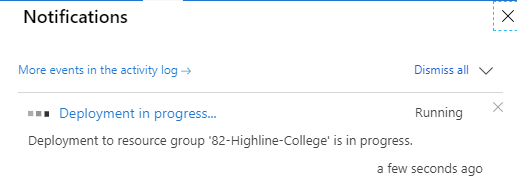
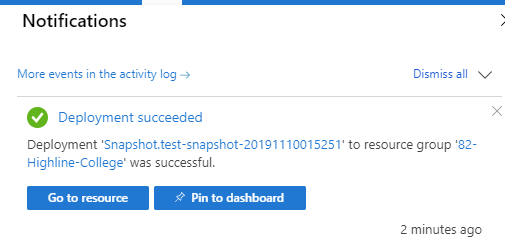
6. You will be notified that the deployment of this new disk is in progress, and it will take a few minutes for this to finish. Once it is finished, you will receive another notification stating that the deployment has succeeded and can be viewed.

Creating a Snapshot in Microsoft Azure

  1. Go to ‘Resource Groups’ under Azure services:

2. Select your resource group:

3. Click on the name of the disk that you would like to create a snapshot of:

4. Click “Create Snapshot”:

5. Make sure the correct resource group is selected, name your snapshot, and select the appropriate account type. For my specific Azure account, I am only authorized to use the standard HDD setting. If I were to set it to premium SSD, the validation for this snapshot would fail — so it is very important to be aware of what your organization will allow you to use.

6. If you chose the appropriate settings and completed all the necessary fields, you will be notified that validation of your settings has passed. If it did not pass, you will need to go back and edit your settings. If validation was successful, simply click ‘create’ to create your new snapshot.

7. Once you click create, it will take a few minutes for the snapshot to be created, but Azure will notify you that the deployment is in progress and will notify you again when the snapshot deployment finishes successfully.

Installing Bash on Windows 10

To install Bash on your Windows 10 machine, make sure you have the latest Windows 10 update and are using a 64-bit OS.
First, search for and open “Settings” from the start menu. Then click “Update & Security” as seen here:

Click on “For Developers” from the sidebar:

Select the option for “Developer mode” and select “Yes” at the prompt:

The components will take a while to install. Once this is finished, open the Control Panel, click on “Programs“, and click on “Turn Windows features on or off” under ‘programs and features.’ In the new window that pops up, scroll down and select the “Windows Sybsystem for Linux” option.

After this, restart your computer. When your computer has finished rebooting, search for bash.exe in the start menu. You should be able to install a Linux distribution from the windows store via the command prompt, and setup a Linux user by running this executable, however, sometimes you will have an error where bash.exe will not launch a command prompt window. If bash.exe will not open, go to aka.ms/wslstore on your browser to open up the Windows store, where we will manually install a Linux distribution:

In this example, we are going to install Ubuntu:

Once Ubuntu is finished installing, we will click the “Launch” button to launch Ubuntu on our Windows machine:

Once the installation completes, you will be asked to make a username and password and will immediately have access to your bash shell. From here, you can begin typing Linux commands on your own Windows machine! If launching bash.exe worked for you, it should immediately send you to this same environment to set up your username and password instead of having to install Ubuntu manually from the Windows Store:

To have access to this shell again, simply search for and open Ubuntu (or whichever distribution you chose to install) in the start menu, and you will have access to it again immediately.

How to change your MAC address in Kali Linux

The MAC Changer tool is what we will be using to change our MAC address in Kali Linux. Simply open up a terminal in Kali to get started!

First, we can use the macchanger -s eth0 command to see what our current MAC address status is:

If you want to randomly generate a new MAC address, you can do so by using macchanger -r eth0 as seen below:

We can also change the MAC address to something specific by using macchanger -m and then specifying the specific address we want for eth0:

Lastly, you can view a list of MAC address prefixes for specific vendors if you have a particular vendor in mind that you want to change your address to. We can view this list with macchanger -l as seen here:

Using a PowerShell script to change the lock screen and desktop background in Windows

If you are creating a Windows 10 image, you will benefit from using a PowerShell script to change the lock screen and desktop background to ensure that all the desktops in your environment are uniformly configured to have the same settings. In this particular example, our PowerShell script is going to look something like this:

The value in quotes next to $Wallpaper and $Lockscreen should match the name of the file you are planning to use for the background and lock screen.

In your C:\ drive, create a folder named ‘background’ and copy the files of the background and lock screen images into this folder. Also, copy the file containing your PowerShell script into this folder.

Next, open an administrator PowerShell prompt and type the following command:
set-executionpolicy unrestricted
Enter Y at the prompt.

Now, type the following commands in PowerShell:
cd c:\ background
./insert_script_name
(Whatever the name of your script is, simply put ./ to run it)

If successful, the PowerShell prompt should look like the following:

Once successful, restart your computer and you should see both the lock screen and desktop background change.

If you ran the script with the incorrect images, or need to undo the changes for whatever reason, search for and open regedit in the start menu to edit the Windows registry.
Then, navigate to: HKCU:\software\microsoft\windows\currentversion\policies\system
Right click on ‘wallpaper’, select ‘modify’, delete the value data, then click OK. Restart your computer, and you can attempt to run the script again with the same process above after you have made the necessary changes.

This is what the location for HKCU:\software\microsoft\windows\currentversion\policies\system looks like. HKCU is listed as “HKEY Current User” under ‘computer’ in regedit.
After you right click on ‘Wallpaper’ and select modify, you can delete the value, click OK, then restart your computer to undo the changes to the background.

Installing Nwipe on Ubuntu Desktop / Creating a DBAN workstation

Nwipe is a fork of the Darik’s Boot and Nuke (DBAN) tool. The purpose of a DBAN is to securely erase a hard disk until the data on it is permanently removed. I will be showing you how to install and use the Nwipe tool on Ubuntu Desktop 19.04 (Though this should be the same process for any version of Ubuntu Desktop).

  1. Open the terminal in Ubuntu and type the following command:
    sudo apt install nwipe
  2. Once the installation is finished, type the following command to open the nwipe tool:
    sudo nwipe
  3. To select the drive you want to wipe, you can navigate with the up/down arrow keys and then press the space bar to select that drive for wiping. Be careful not to select the drive that your OS is installed on, or you will compromise your workstation.
  4. At the bottom of the terminal, Nwipe will give you options to modify the method you want to use for wiping, how many rounds you want, whether or not to verify each pass, and what PRNG you want to use. Typically, I will modify the method and change it to “DoD 5220.22-M” and leave everything else at its default.
  5. Press the Shift+S keys in combination to begin the wiping process. This process can take quite a while, and the program will keep you updated you under the “Statistics” column what your runtime is and the estimated amount of time left for the wipe.
  6. When the wipe is finished, you can quit the program by using the Ctrl+C keys in combination.
This is how you install the nwipe program
Using the command sudo nwipe will open up Nwipe. Press the spacebar to select the drive you would like to wipe.
Press the M key to modify what method you would like to use. Press space to select the method
Press the Ctrl+S keys in combination t0 begin the wiping process. The remaining runtime and other statistics can be monitored under the Statistics column.

How to Defragment Your Hard Drive

Over time, your hard drive will become fragmented, which can slow your computer down. Most systems will automatically defragment your hard drive regularly (once a week by default), but if you need to do it manually, you can do so by following these steps:

  1. Click the Start Menu, type “optimize”, and click the “Defragment and Optimize Drives” option that appears.
  2. Select your hard drive and click “analyze.”
  3. If the drive is fragmented, click the “optimize” button to defragment it.
  4. The process will take a while — Once it’s done, the drive should say it is 0% fragmented, and you will be finished.
  5. You can select “Change settings” if you would like to change the frequency that your hard drive is automatically defragmented.
This is where you find the Defragmentation tool.
This is where you can select your hard drive, then click to analyze and optimize it.
You can change how frequently your hard drive is automatically defragmented by clicking “change settings”.

Adding a shortcut to ‘My Computer’/ ‘This PC’ in Windows

  1. Press the Windows + R key on your keyboard in combination to bring up the run box.
  2. In the run box, type and enter:
    %appdata%\microsoft\Windows\Network Shortcuts
    This is the location where Windows will look for additional shortcuts.
  3. Right click on the empty space, select ‘new’, then select ‘shortcut.’
  4. In the “Create shortcut” dialogue box that pops up, enter the location of the program, file, or folder that you would like to insert as the shortcut. Click next, type a name for the shortcut, and then click finish.
  5. Click on “This PC” and you should see the shortcut appear under “Network Locations.”
Step 1+2
Step 3
Step 4
Step 5