- Go to ‘Resource Groups’ under Azure services:

2. Select your resource group:

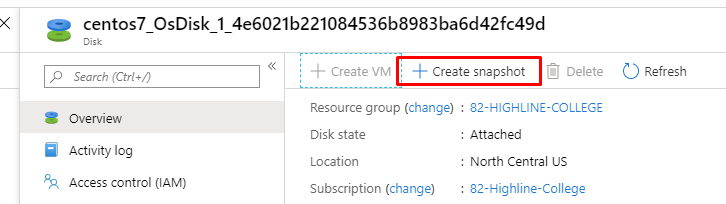
3. Click on the name of the disk that you would like to create a snapshot of:

4. Click “Create Snapshot”:
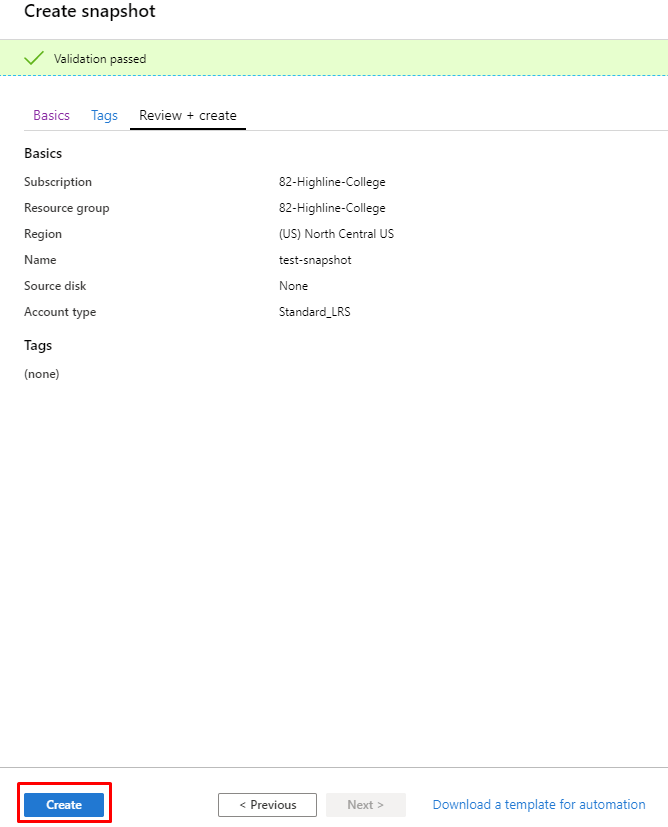
5. Make sure the correct resource group is selected, name your snapshot, and select the appropriate account type. For my specific Azure account, I am only authorized to use the standard HDD setting. If I were to set it to premium SSD, the validation for this snapshot would fail — so it is very important to be aware of what your organization will allow you to use.

6. If you chose the appropriate settings and completed all the necessary fields, you will be notified that validation of your settings has passed. If it did not pass, you will need to go back and edit your settings. If validation was successful, simply click ‘create’ to create your new snapshot.
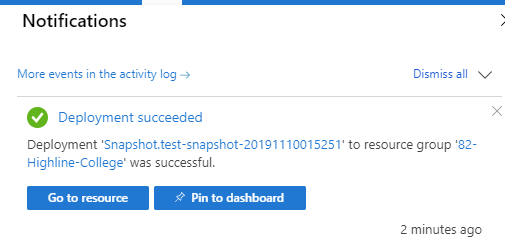
7. Once you click create, it will take a few minutes for the snapshot to be created, but Azure will notify you that the deployment is in progress and will notify you again when the snapshot deployment finishes successfully.